NATO
Main Battle Tank
Meng’s
1/35 Leopard 2A7
by CRISTIAN LUPU
Ground up to shiny PE
The build process starts with the classical step of assembling the wheels. Two drive sprockets, two idler wheels and 14 road wheels need to be prepared at this stage. (Photo 1)
The road wheels have been left separated until after the painting process was done. This way the inner side can be painted bronze green and the rubber rims can get their correct colours. (Photo 2) The lower hull has a lot of the smaller pieces already cast on which makes assembly a breeze. The shock absorbers are all one piece and their hydraulic pistons are the only parts that need a separate colour (gloss silver) on the bottom part of the vehicle. This means everything can be assembled and painted in one go later with the silvery details easily picked out by hand. (Photo 3).
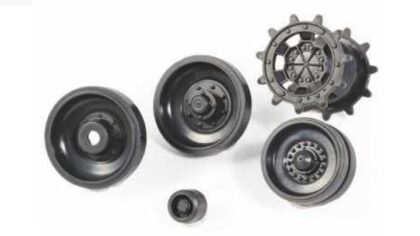
Photo 1.


Photo 2.

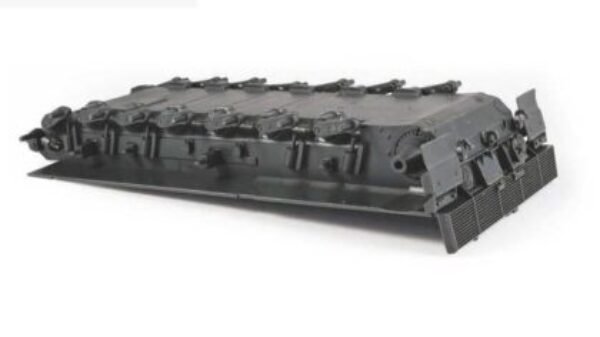
Photo 3.
The clear parts for the head, position and convoy lights are painted separately and left off until the weathering phase starts. The lower hull assembly is concluded with the addition of the belly armour and the stiffeners. It is worth mentioning there is useful template provided for positioning the stiffener.
The tracks contain 84 links’ each with every link composed of an outer face, an inner face and a connecting pin. An assembling tool is provided on each sprue which makes positioning and alignment easier. The inner and outer faces are simply clicked together after positioning the pins between them.
The assembled links are fairly stable but one may want to place a bead of glue between them for more robustness, making sure the pins remain movable. The instruction suggests building subsets of six links but the sixth link should really not be closed at this point as it will have to include the pin of the next group when everything comes together. The groups should only include five links with the connecting pins visible on both sides. (Photo 4) Around six hours total were necessary for cleaning, assembling and painting the tracks alone. A lot of work but the results are worth every minute spent. (Photo 5)
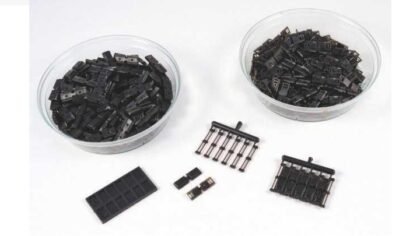
Photo 4.
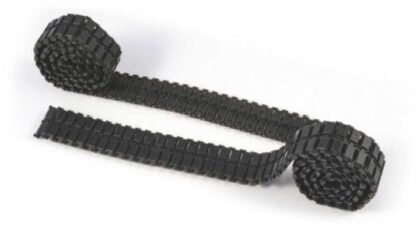
Photo 5.
The use of PE parts is well thought out and will provide additional details where styrene hits its limits. The prime example here is the side mesh on the air filter intakes. (Images 6) The rear view mirrors can be assembled in upright or folded position. Unfortunately, there is a huge ejector pin mark right in the middle of the mirror which is really hard to clean. However, once cleaned, the pre-cut silver foil supplied for the mirrors will do an excellent job.
A rather inconspicuous detail is the two different lens types provided for the headlights. While this reflects great attention to detail on the kit itself, there is no information on when to use one or the other in the instructions. The clear parts for the periscopes are all assembled and masked at this point in order to allow for closing the hull. The outside is covered with a silver coat to improve the light reflection within the parts but the see-through sections are left unpainted as these will peel when the masks are removed later on. The paint masks on the clear part are achieved using regular masking tape applied to the parts and pushed in the corners using a cocktail stick then cut to shape with the hobby knife using a fresh blade. (Photo 7) The tools on the rear deck are all prepared at this stage but will be painted separately and assembled right before the weathering phase.
Probably the most controversial part of this kit is the string that is provided for the towing cables. This is something that seems to be out-of-place with its 70s flair on this high-tech kit of the 21st century. However, this feeling will vanish once the parts are painted. They will not only take paint excellently but will also reproduce the real part very, very well while being a lot more flexible than wire. The side skirts are composed of a front and rear section with the front part being a sub-assembly of not less than 6 parts. The details available on the inside of the front part would allow for these to be mounted folded down as would be the case for transport. However, once again, there is no information about this option in the instructions. The main gun is built from two sections split along the main axis and a third piece for the muzzle.

Photo 6.

Photo 7.
The gun is attached to the turret using poly caps which would allow it to be raised or lowered while being able to keep any intermediate position. The pivoting add-on armour with its interior details and even crew packs supplied is another eye-catcher with this kit (Photo 8). If sport cars have their front grilles and lights to make them stand out of the crowd, the angled front add-on armour has to be their equivalent on the Leopard 2 A5 and later versions. This section is built from three parts on both sides and is looking really great thanks to the provided anti-slip coating. (Photo 9)
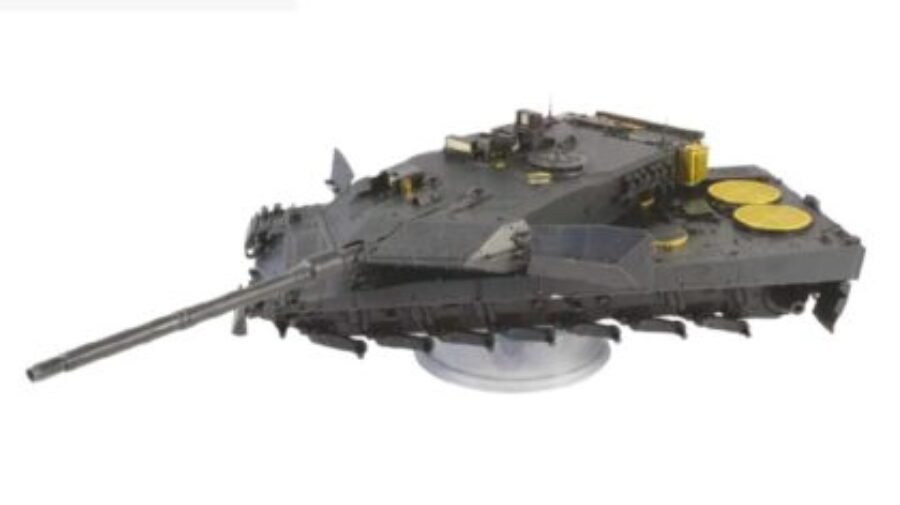
Photo 8.
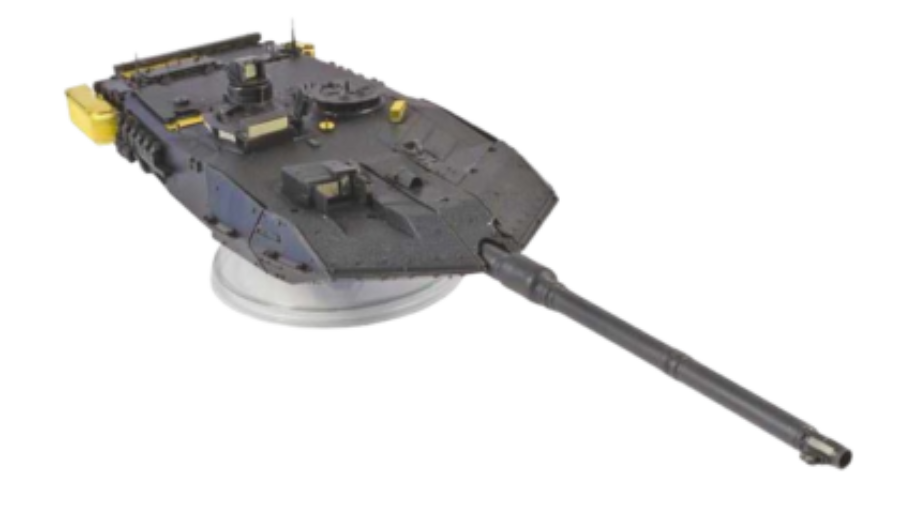
Photo 9.
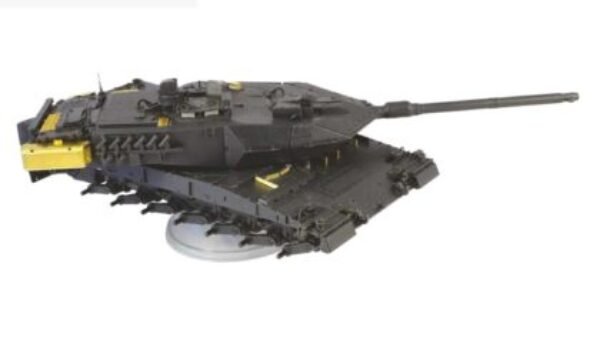
Photo 10.
The MG is supplied in two versions with and without butt and both are nicely detailed. Once again, there is no word about when this is to be assembled. As most reference images would show this missing on the vehicle, it has also not been assembled on the kit. The commander’s display is also something that is not seen very often on the reference images but this being a specific feature for the A7 it has been assembled, nonetheless. The smoke grenade launchers are probably the best of their class but the cap fixation chains are missing. (Photo 10).
The clear parts for the periscopes and sighting systems have been treated with the same silver coat and masking as their counterparts on the hull (Photo 11). The details are great, something you don’t see very often with clear parts.
The most distinctive feature of the A7 variant is the back section of the turret with its plethora of storage boxes and the air conditioning (A/C) unit. All of these boxes are assembled separately and apart of the tracks, these would make for the most time-consuming steps. The details present on the interior suggest that some of these sub-assemblies could be shown open but the instructions do not give any hint in this regard. One aspect that really stands out with the rear turret section are the PE meshes supplied for the storage baskets (Photo 12).
A folding template is provided for producing them in the right shape and, mixed with some plastic parts, these will form beautiful baskets. The hinges and handles added to the other boxes and the A/C unit are providing some outstanding details, being unfairly shadowed by the shiny PE parts on the bare model. (Photo 13)

Photo 11.

Photo 12.

Photo 13.

Photo 14.
Painting and weathering
Given the fact that at the time this kit was released the German Army was the only user of the A7 variant, the painting guide also only provides two versions for German Leopards, both in the three colour NATO camouflage. The painting process starts with the PE parts which are covered with a layer of Vallejo 70.605 German Red Brown primer. (Photo 14)
The base coat was laid out with Revell 65 Bronze Green, a colour that is very close to the initial styrene colour which sometimes made the painting difficult because telling apart bare plastic and painted areas requires very good lighting and a lot of attention. (Photo 15) The real NATO vehicles have hard-edged camouflage schemes however; on a scale model making these edges all that hard doesn’t look realistic. In order to avoid this effect, free-handing the camouflage patches has been selected over the classical masking with putty. While extra attention and a good grip on airbrush handling, paint thinning and air pressure settings are required with this method, the overall amount of work compared to putty masking is not sensibly higher while the results would look more realistic.
The black patches take up the second largest area on the vehicle so these have been applied next using Revell 06 Tar Black. The colour has been applied in a slightly cloudy coverage to provide that all-so-subtle variance in colour. (Photo 16) While the NATO camouflage does not follow a predefined pattern which gives the modeller room for interpretation, the painting guide will still provide good guidance. The set of brown patches has been applied using Revell 84 Leather Brown. Again, the application was not aiming for a uniform coverage but the aforementioned cloudy variance. (Photo 17)

Photo 15.

Photo 16.

Photo 17.

Photo 18.a & b
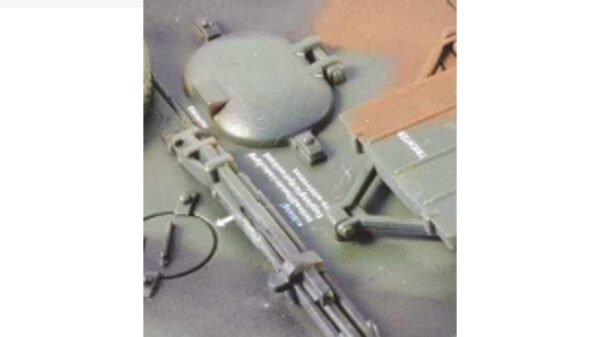
After the three camouflage colours were dry, Revell 01 Clear Gloss has been applied in several thin layers to the areas which were to receive the decals. A good guide to determine whether the gloss layer is good enough is holding it angled in the light. If it reflects light visibly and evenly, the surface is ready to receive the decals. There are several positive aspects worth mentioning about the decals.
The printing quality is superb with matt surface, colours in register and virtually no carrier film outside the printed areas. The carrier will also separate in a matter of seconds from the paper when dipped in warm water. The written text is still readable, despite the letter sizes being as small as two millimetres. On the negative side, the spelling on the decals is sometimes incorrect with missing or incorrect letters. Unfortunately, this is something we keep seeing with other manufacturers as well. (Photo 18)
The tracks have been primed with Revell 09 Anthracite to replicate the rubber pads on the outside, followed by a mix of A.MIG-044 Chipping (70%) and Revell 91 Iron (30%) on the inner side of the tracks and between the rubber pads on the outside. Once the paint was dry, the middle section, left and right of the guiding teeth has been rubbed with A.MIG-3009 Gun Metal pigments to lend the tracks the polished metal look that develops from friction with the rubber wheels. (Photo 19) The tools which have been left off the vehicle for this painting stage have been painted Revell 09 Anthracite for the metallic parts and dry brushed with Revell 90 Silver while their wooden handles have been painted with a mix of Revell 314 Beige (70%) and Revell 84 Leather Brown (30%) followed by a filter of A.MIG-1408 Fresh Engine Oil. (Photo 20) The towing cables have been painted with A.MIG-044 Chipping then dry-brushed with Revell 91 Iron and washed with A.MIG-1408 Fresh Engine Oil. The hooks have been kept Revell 65 Bronze Green with chips simulated by Revell 90 Silver. (Photo 21)
The last step before starting the weathering process was to paint and assemble the small details like the lights which have been left off until now. (Photo 22)
The weathering process has been started by applying a crusty mud layer to the hull bottom. For this, equal parts of plaster of Paris and sifted dirt from the garden have been mixed with hobby glue and water (Photo 23) forming a textured stodge which was then applied with an old, stiff brush in the crevices which are normally hard to reach above the road wheel suspensions in the upper section of the fenders but also on the front and back of the hull. The colour of the textured layer was of secondary importance here as the following dust layers will cover it to a large extent. (Photos 24 & 25)
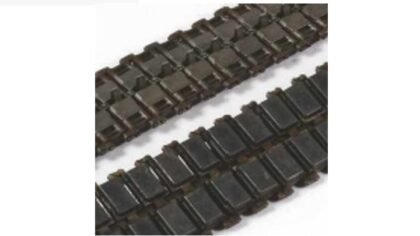
Photo 19.
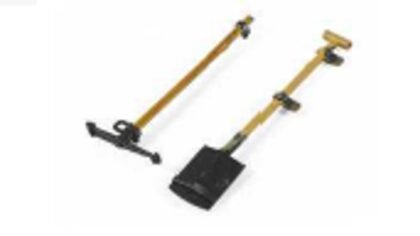
Photo 20.

Photo 21.
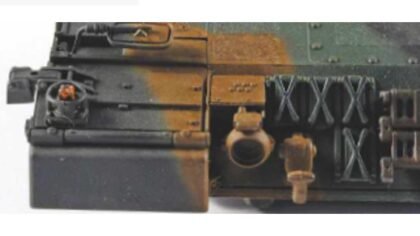
Photo 22.
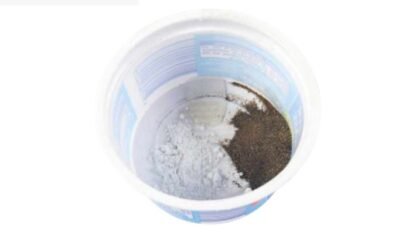
Photo 23.

Photo 24.
Once the textured mix was dry, it was covered in an even layer of A.MIG-029 Desert Sand with random patches of Revell 82 Dark Earth and local spots of a dark wash. The marks left by weather, fuel, lubricants and dust have been reproduced with an oil dot filter. This method is based on small dots of oil paint in various colours applied randomly on vertical and horizontal surfaces which are then blended away using a large brush moistened in thinner to leave behind a hint of different colours, breaking the uniformity of the painted surfaces and suggesting the teeth of weather and time gnawing on the vehicle.
Small amounts of Winsor & Newton Cobalt Blue Hue, Zinc White, Burnt Sienna and Lamp Black have been put on a piece of cardboard. The advantage of this approach is that the oils contained by the paint are sucked away by the cardboard, reducing the glossy effect specific to oil paints, (Photo 26) Using a small, round brush, random dots have been applied to the vehicle working in small areas at a time. These have then been faded away using a large brush moistened in lighter fuel fluid (Photos 27-30). The lighter fuel has been chosen as it further reduces the glossiness of the oil paints while being less aggressive than other thinners to the acrylic paint below it.

Photo 25.

Photo 26.

Photo 27.

Photo 28.

Photo 29.

Photo 30.

Photo 31.
Removal has always been done following the same path fluids would take on the give surface (e.g. top-to bottom on the sides). The masking on the periscopes has been removed at this stage and the transparent parts have been painted with a mix of Revell 364 Leaf Green (50%) and Revell 01 Clear Gloss to replicate the green tint of the armoured glass elements. (Photo 31)
The wheels and tracks have been assembled next, together with the side skirts. The alignment of the skirts would need a bit of extra care as the assembly guides are rather small. (Photo 32) The side of the vehicle and the wheels received the same dust layering as the suspensions with A.MIG-029 Desert Dust followed by random patches of Revell 82 Dark Earth. (Photo 33) Further dusting has been done using blended layers of Vallejo 73103 Dark Yellow Ocre, Vallejo 73105 Natural Sienna and A.MIG-3007 Dark Earth pigments. Each pigment type has been diluted in a mix of water and isopropyl alcohol (IPA) then applied to the model (Photo 34).
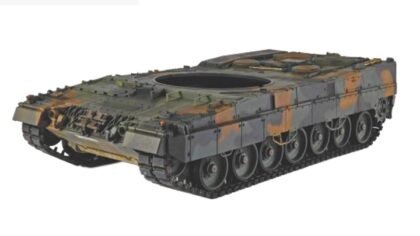
Photo 32.

Photo 33.
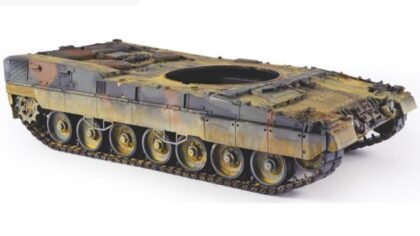
Photo 34.
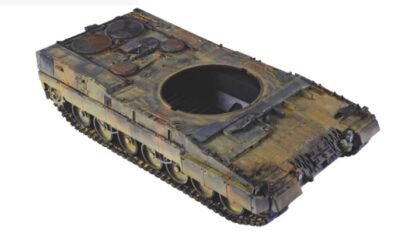
Photo 35.
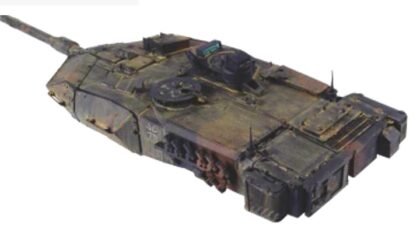
Photo 36.

Photo 37.

Photo 38.
Once the water-alcohol mix has evaporated, the pigments have been distributed on the surfaces using a dry cotton bud and a water-moist large brush. (Photo 35) The pigments have been applied on top of each other starting with the lightest colour and finishing with the darkest one, reducing the amount applied as they became darker. The anti-slip on the horizontal surfaces will pick up the light, dust-coloured pigments, making their structure even more visible. However, less is more in this case, so excessive pigments need to be removed more thoroughly. (Photo 36)
Conclusion
The kit has an excellent level of detail with most, if not all of them, correctly reproduced, a great fit and PE details where these are required. Not to mention that this is the first styrene kit of the A7 ever produced. All in all this was a very enjoyable project and well worth the time invested. The finished vehicle is a very impressive one and will for sure draw attention (not to mention envy!) be it on the shelf, your working desk or on a contest table.


