Mark Bannerman
shows us how to add realistic effects
to miniature figures
In this short article, I will share one of several approaches on weathering and dirtying clothing on figures using enamels; specifically, for showing mud, fading cloth, stairu, and dirt. The masters’ approach this process by mixing Humbrol Flesh 61 and various earthtoned Humbrol enamels into a semi-wet base colour. With slow and meticulously placed jabs and pokes of the paint brush, the earth colours are blended into the base by varying the colour tones – adding lighter and darker colour shades.
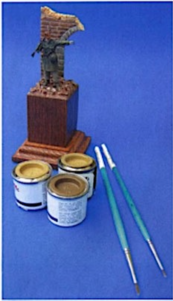
This approach, combined with carefully controlled and strategically placed washes of earth coloured enamels goes a long way to achieving realistic faded and dirty areas on clothing. Of course, there are many approaches and different techniques depending on the medium (acrylics, oils or enamels) one opts to use. For this article, I will share a ‘quick and dirty’ approach to weathering clothing which I use quite frequently, particularly on figures that have been silting around for eons and need a little realism put into their overall appearance.
This is a slightly different approach to the methodology mentioned above in that this process is applied when the base is dry as a bone! My choice of medium for weathering clothing is enamels. My reason for this is that I find it the simplest to use, it dries extremely flat and matt and it is quite manageable.
…..I jabbed the colouron in light pokes…
Also, because of the extended drying period of enamels (over acrylics), application of enamels can be ‘reversed’ if overdone. Once a figure is completely painted – be it in acrylics, enamels or oils – I proceed to work on the uniform to transform it from a ‘parade’ clean-looking uniform to a weatherbeaten, dirty and dusty uniform. I usually apply the weathering after the base, highlight and shadows are completely dry.
For this project, I used a Jaguar figure – designed by Yoshitaka Hirano – with a replacement Hornet head and a few small alterations to the figure. As I wanted to depict the figure at Karkhov, the uniform would need to show considerable wear and tear.
figure is completely painted – be it in acrylics, enamels or oils – I proceed to work on the uniform to transform it from a ‘parade’ clean-looking uniform to a weatherbeaten, dirty and dusty uniform. I usually apply the weathering after the base, highlight and shadows are completely dry.
For this project, I used a Jaguar figure – designed by Yoshitaka Hirano – with a replacement Hornet head and a few small alterations to the figure. As I wanted to depict the figure at Karkhov, the uniform would need to show considerable wear and tear.
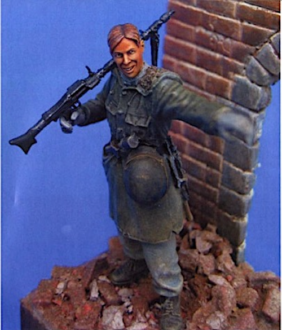
The figure was base-painted entirely in Humbrol paints using a green-greyish mix for the jacket and a blue-ish grey for the trousers. The highlights and shadows were completed by adding Paynes Grey oil colour to the base colour of the jacket, dark grey enamel shadows for the trousers, and a spec of Titanium White oil colour added to the base colours for the highlights.
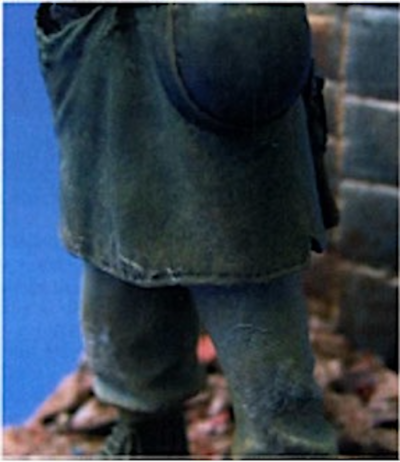
After all had dried thoroughly, I determined which areas would require heavier wear and tear – namely, the knees, the bottom of the greatcoat, the boots and elbows. My first step in the weathering process was addressing the lower half of his greatcoat.
…The whole process took about 45 minutes…
To depict dried mud, I used Humbrol Khaki Drill 72, Dark Earth 29 and Matt Flesh 61. I reached to the bottom of each tin with a toothpick and placed a bit of the murky residue onto a plastic palette. I then proceeded to mix. a bit of Humbrol Dark Earth with Humbrol Khaki Drill in a 50/50 ratio and dipped my $1.99 ‘0’ brush into the mix. I removed the excess with a cloth leaving a small amount of paint on the brush (typically same amount one needs for dry-brushing armour) and proceeded to lightly jab the paint onto the lower part of the greatcoat. At first, ii may seem as though no paint b adhering at all, but this is fine and perfectly normal.
I jabbed the colour on in light pokes with the brush and ensured that only the tips of the bristles hit the surface of the figure. Next, I added a bit of Humbrol Flesh 61 to the mix and again, removed the excess paint and lightly jabbed the brush onto the same lower area of the greatcoat going all of the way around. I probably jabbed the brush 45- 50 times while rotating the figure. I then added Humbrol Matt White 3-1 to the mix. and repeated the step. It is ideal to go from a dark tone on the lower part of the coat working up to a lighter tone.
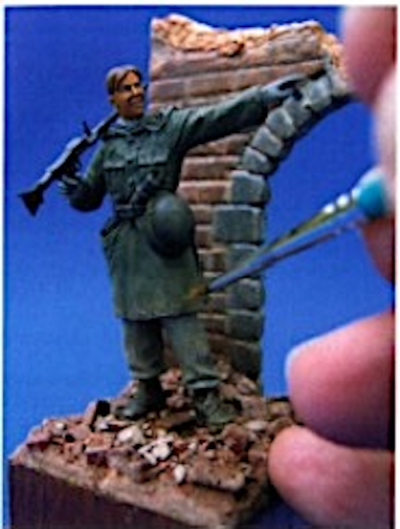
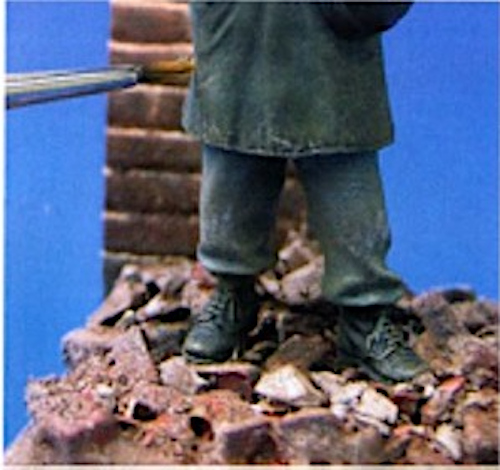
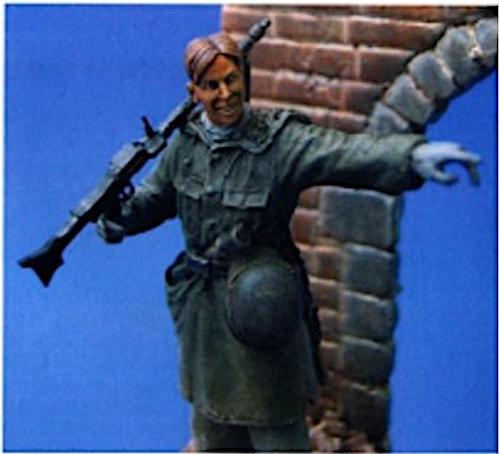
The trick is to ensure that the paint application is kept very light with each jab, avoiding at all costs scrubbing or stroking the brush back and forth. The same technique was used for the trousers and elbows of the coat with the exception of starting with a circular pattern of dirt tones (Humbrol Khaki Drill mixed with Matt White) and working to the centre of the knee-caps and elbows and then finishing off with neat Humbrol 29 in the centre part, again, always keeping as little paint on the brush as possible and keeping it all very subtle.
If too much paint is applied, there are two ways to reverse this. Either ‘mute’ or cover the effect by jabbing some of the original uniform base colour to tone it down or use a little thinner to remove the excess paint. I would suggest the first option as this carries less risk of messing up the work already done.
The jabbing motion is critical because it gets the paint into those hard-to-reach nooks and crannies. It also helps to blend one colour into another without leaving hard edges. The stroking of a brush back and forth, as in dry brushing, to apply dirt and mud results in only the highlight areas receiving the treatment and it can also leave nasty brush marks as well. The whole process took about 45 minutes and drastically altered the overall appearance of the figure from clean-looking to weather-beaten.
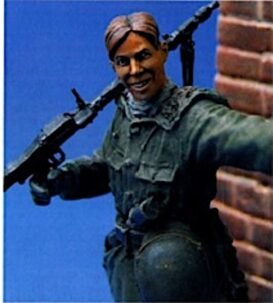
For the remainder of the figure, the head was painted in oils using a combination of Gold Ochre, Burnt Sienna and Titanium White. All leather was painted in white, then stained in Burnt Sienna and dry-brushed in Raw Umber oils. The MG 34 was painted in Vallejo Gloss Black and dry-brushed with Xtra Color Grimy Oil.
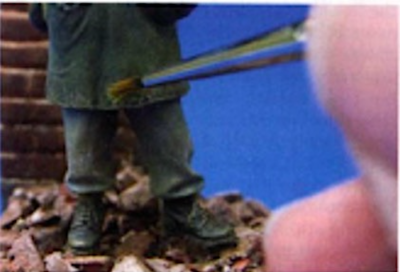
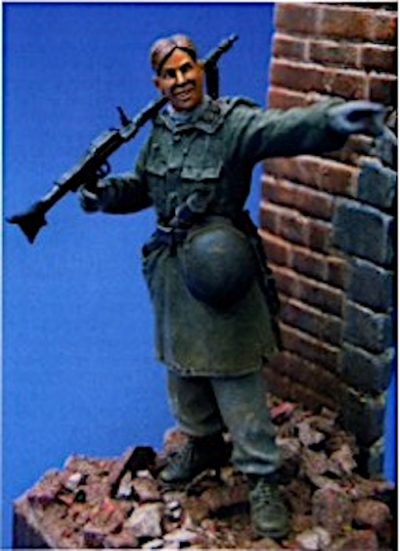
The boots were painted in Humbrol Brown Bess (used to be 170 and now discontinued from the current Humbrol range. Ed) and dry-brushed in Khaki Drill. The DML helmet was also weathered using the jabbing motion and a strip of Tamiya masking tape was cut to size, painted and wrapped around the crown of the helmet. The base is a simple, a 1-inch square wooden stand with VLS bricks glued down with epoxy and painted in various Humbrol red-brown colours.
The partial wall is a DioArt offering and was painted in red-brown, dry-brushed in a Humbrol grey and washed with oil paints. To finish off the project, some earth-coloured MIG pastels were applied on the base. The pastels were also applied sparingly on high wear areas of the figure to smooth out the overall appearance and to help tie it more closely to the ground-work.
By kind permission of Doolittle Media. Originally published in Military Modelling
