Cast it !
David Love
begins a two-part feature on making RTV moulds at home to reproduce master models using the Nordenfelt machine-gun first seen in a previous article as a master pattern
Readers may remember Military Modelling vol. 27, issue no.4 where I showed the stages of constructing -‘Running Low on Ammunition’, a diorama based on a 1-inch Nordenfelt anti-torpedo boat gun and crew.
I prepared two sets of parts for the gun; one set, was made up and painted for the diorama, the second set was intended as a set of n1aster parts for white metal casting. I had been practising for some time casting in silicone rubber, mainly because it was impossible to get hold of 54mm scale models of the annan1ents that interested me, other than by making them myself.
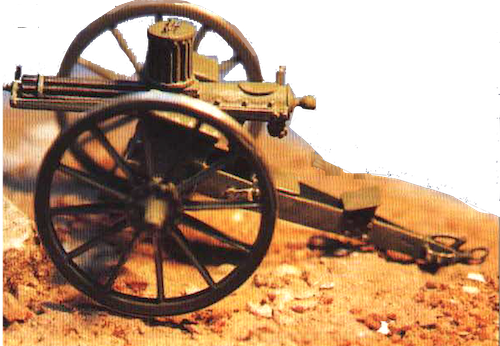
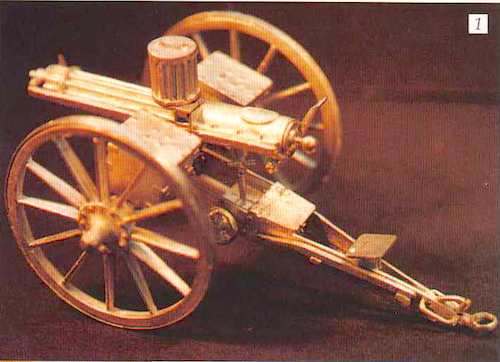
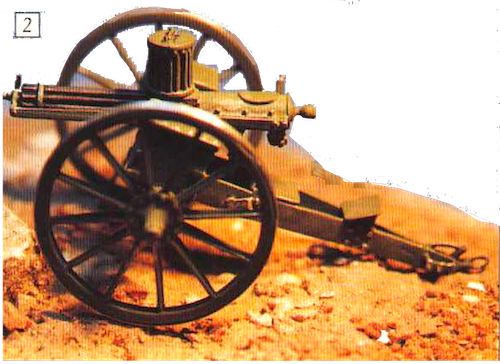
My first attempts had produced quite acceptable models of a .45 calibre Gatling gun (see photos) and now I have all l need for future Gatling models. ft had, however, taken a great deal of researd1, both in terms of ensuring the model was factually correct (within scale reason) and in the design and manufacture principles necessary.
First and foremost I must say that the process is not difficult, it’s just nee to understand a few procedures, know about the materials used and stick to straight forward rules in processes and a common sense health and safety regime.
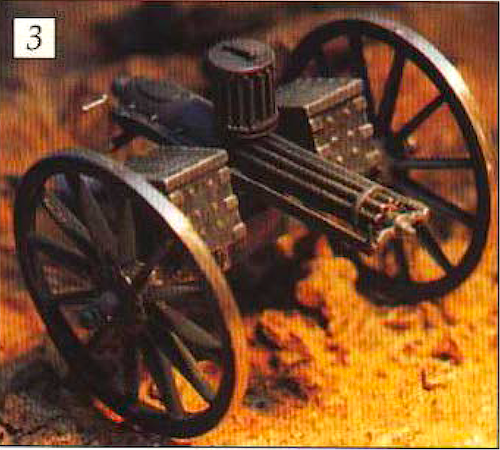
1 – 4. The author’s Gatling gun was produced by the methods described in the article

Copyright
I’m no expert in the legal ramifications, but if you want to pass something off as your own work then it must be just that-your design, sculpture, casting, etc. As this process will faithfully reproduce the finest detail, even fingerprints, and there is the temptation to copy items, the danger of copying could create all sorts of problems in terms of copyright infringements, it’s just not worth it. I ensure that I keep all my sketches, mock up and master parts as proof that it’s all my own work The reader will, of course, decide how to handle this aspect for themselves. However, l felt it w was necessary to point out the possible problem.
The process
The principle of casting white n1etal in rubber moulds is based on the ten1.perature resilience of the rubber being greater than the melting point of the meta I it is required to cast. Once the moulds are made they can also be used for casting resin, but this article concentrates on casting metal because there is something satisfying about the weight of a metal kit and it seems the ideal material to represent a metal gun. The best way to explain the process is by breaking it down into the various operations necessary and so I have prepared photographs keyed to the following explanations.
Master preparation
This is the artistic bit, the way the master is prepared and the quality of finish of the part is dependent on the skill of the craftsman. The golden rule to remember is that the rubber will reproduce the castings exactly, therefore, it is worth spending time finishing the master parts to a quality way beyond that whid1 is normally acceptable in general model making. 1n the case of the Nordenfelt, all the parts were made and finished with the eventual casting process in mind.
Photo 5 shows the components laid out. (The previous 1’v1M article explains in detail how the parts were made). Generally speaking, masters can be made from any material, but l always use materials that can be properly cemented such as plastic card sheet and ABS shapes because a certain amount of strength in the finished assembly is required.
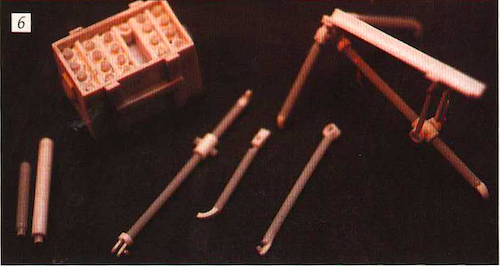
Photos 6,7 & 8 show some examples of the different n1aterials used for the masters I have prepared for other projects I am working on.
The camel sides are MilLiput and Duro; the Gatling is a cut down metal casting from the Gatling kit with plastic card frame. The Hales Rocket equipment is ABS shapes (railway model shops) plastic card and commercially available plastic sections. It is necessary to ensure that whatever components are made they are very securely assembled as the mould making process; can tend to cause the bits to come apart when the masters have to be removed from the wax base at the first mould stage.
You can, if you wish, undercoat the parts, but, bear in mind that brush strokes will show up and you may find, like l have, that it’s not necessary.
It is good looking castings you want, not cosmetically good looking masters. Once you have a set of parts you are pleased with and you have checked that they all go together as an assembly – unless of course you have only a single part – you can start on the mould preparation.
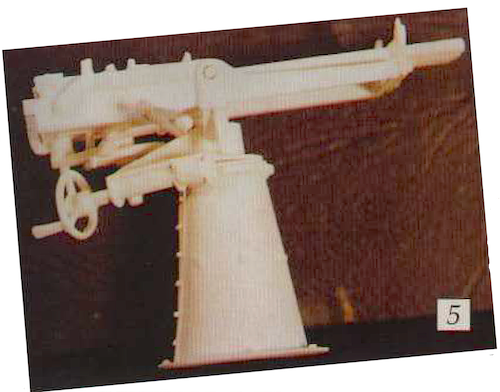
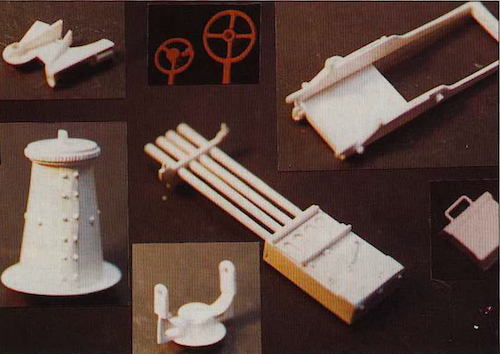
- Master patterns for the Nordenfell machine-gun.
- Master parts for the Hale’s Rocket equipment are ABS shapes (railway model shops) plastic card and commercially available plastic sections.
- The Gatling is a cut-down metal casting from the Gatling kit with plastic card frame.
Mould making – first stage
The first stage mould is prepared as follows. (Refer to photographs 9 to 20).
You will need to soften up some Scopas wax; the wax is not like candle wax.
When it is warmed in the hand it becomes very soft and malleable, it feels very hard when you receive it, but don’t be disconcerted as it ends up like Plasticine after only a little working.
Silicone rubber sticks to Plasticine, but it won’t stick to Scopas wax. It’s possible to use Plasticine for the first stage, but you will need to ensure the coat of release agent is well established before you pour the rubber. (T recommend you use the wax.)
Photo 9 shows the wax laid out to about 6mm thickness and smoothed over with a finger, you will need a base of card or board to support the 1st phase.
Photo 10 shows the component being pressed into the wax; a small amount of wax has been removed from under the master to facilitate the indentation and reduce any possible distortion.
You need to aim for about half and half indentation, but this is not essential as wax can be built up around parts, see photo 11, where the joint between wax and component is being cleaned up.
At this po.int it is necessary to decide on how you will pour the metal, and position the pour reservoir which can be made from wax or some other material, but it should be coated with a smear of wax to minimise sticking. The reservoir is larger at the top than the bottom to facilitate pouring of the hot metal and acts as a head for the metal giving the molten product some weight to force it into the mould.
It also reduces the amount of rubber needed in the mould. It is, of course, possible to cut the reservoir away after the mould has been poured and has cured and this is left to the reader, but this method is less wasteful and works for me. I also indent the surface of the wax with the blunt end of a felt tip pen cap to form keys to ensure correct register and alignment of the two mould halves, once they are bought together for casting.
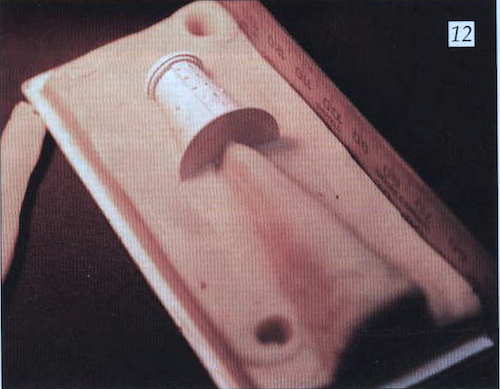
Photo 12 shows the wax edges being trimmed straight with a steel rule. It is best to keep all corners square as the mould box looks a lot better and facilitates handling later. Once all the edges are straight, a box should be built arow.1d the wax and master component as per photo 13.
The essential element here is to ensure that comers are sealed and the base is well connect to the box you are building. I use masking tape tightly wrapped around the box sides and strips to connect them to the base. I use 4n.1m thick foam board (used by graphic artists and architects for promotional displays) cut to 22mn1 widths for my box sides, but thick card or even plastic Lego bricks could be used.
Photo 14 shows a dental probe being used to smooth out the wax to the box sides and photo 15 is the finished article. All the components in the assembly should be set up this way and set aside for the wax to firm up ( as it gets cooler it starts to harden).
In this way all the moulds will be ready for rubber to be poured in one go. I have found that pouring moulds individually can be very wasteful as you will see as we continue.

Pouring the rubber
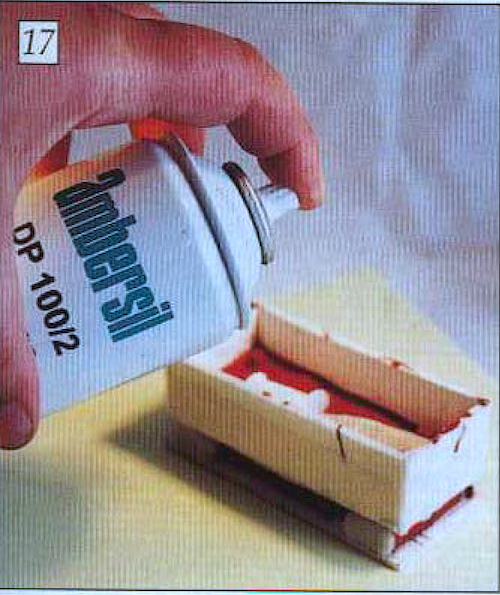
Using a long-haired soft brush lightly go over the surface of the wax and master to remove any dust particles or loose wax pieces. Lay all the moulds out onto a sheet of newspaper and spray quite liberally with DP100/2 release agent making sure you follow the instructions on the can. Aim for each mould to be just wet. Photo 16.
After 10 minutes repeat this process ensuring that release agent is sprayed onto the insides of the mould box sides; again, aim for just wetting the moulds and leave them for at least one hour to dry off. (You will find patience is a virtue in casting!)
RTV 31 rubber has a pot life of about two hours so there is no rush. Before you open the tin be prepared for a thick, brick-red colour liquid which sticks to anything, is hard to remove from clothing and can be exasperating to pour.
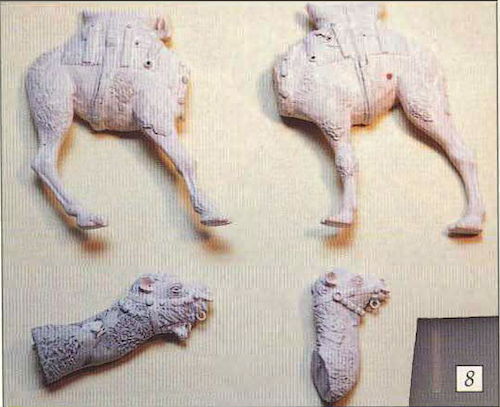

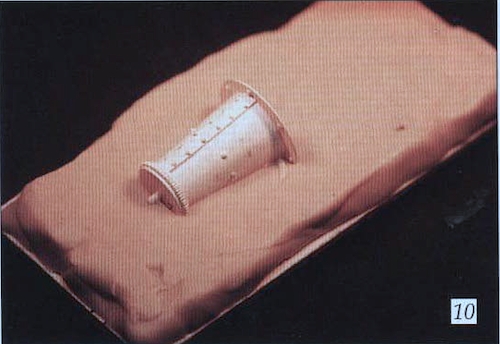

8. Camel sides and heads are Milliput and Duro. 9. Preparing tire first half of the mould with Scopas wax. 10. Patten for the mounting half embedded in the WAX.
11. Tidying up the join around the mounting. 12. Squaring up the first half of the mould. (Note the ‘keys’ embedded). 13. Walls added to the lower mould half.

The RTV 31 will need to be stirred before it is mixed with the catalyst for room temperature vulcanising.
To do this I use an old, clean screwdriver you’ll see why when you start trying to stir this .material, it is extren1ely tough stuff to stir. The product must be well mixed by itself before it is mixed with catalyst because it contains a filler which will cake in the liquid rubber if left for very long on the shelf. It’s not enough to pour some rubber out and mix that as it may not contain the proper constituents (‘cream on top of milk, etc.’) it must be mixed in the tin as a whole first.
Now you will see why I use a good strong/ dean screwdriver. After a couple of minutes mixing you can pour from the tin to the mixing jug – I use a 500ml polythene kitchen jug (50p each from hardware shops), but anything, preferably plastic, will do so long as it is marked in 100ml gradations.
To calculate the amount of rubber you will need for the first mould stage, multiply the area of all the moulds by the depth from the top of the mould to the level of wax. The cubic centimetres of this calculation equates directly to the millilitres of rubber needed.
For example a mould with an area 5cm x 5cm and 1.5cm depth will require 37.5ml (or say 40ml) of rubber. I suggest that you pour 100ml at a time and add catalyst bit by bit as it becomes extremely difficult to stir more than 200ml at a time in the measuring jug.
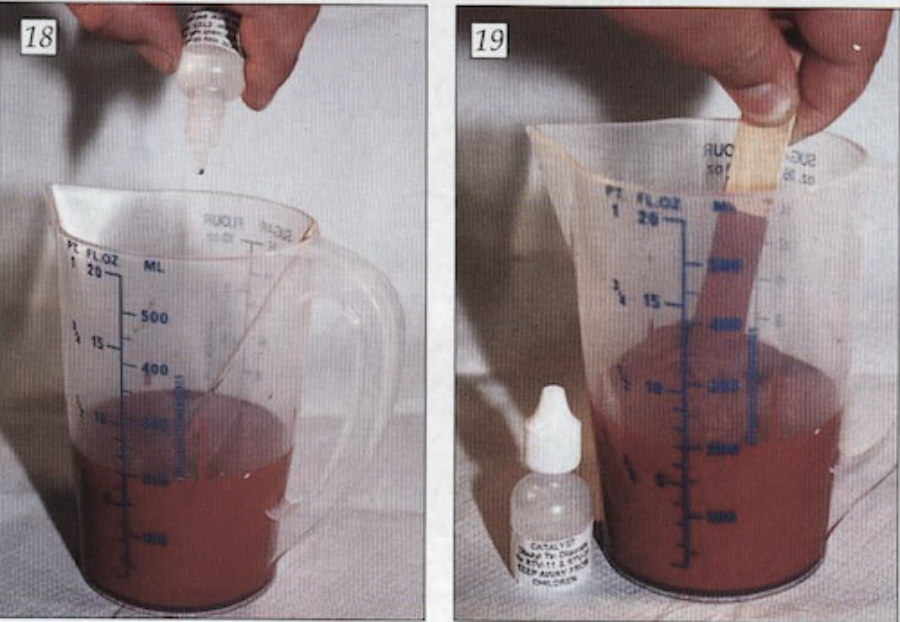
The specific gravity (SC) of RTV 31 is 1.45, so 100ml of RTV 31 is equivalent to 145 grammes. The recommended dose of catalyst to rubber is 10 drops per 100 grammes so every 100ml of rubber will need 14 drops of catalyst. Once the catalyst is added to the rubber the whole thing must be well stirred; once again l use the clean strong screwdriver. Whatever you use for stirring .it must be cleaned before it is used for stirring any further uncured rubber for obvious reasons.
Photo 17 shows the rubber being poured, photo 18 shows the catalyst being added and photo 19 shows the mixed rubber going through its vulcanising reaction.
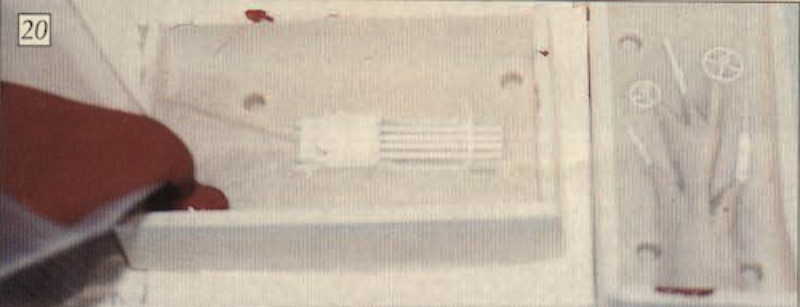
Once the catalyst is added you have a pot life of approximately 2 hours so you should have plenty of time for the next stage. I would recommend that you measure out enough rubber to half fill all the moulds you have prepared, so, if the volume of the moulds is say 500ml in total, then you should have 200-250mls in the measuring jug and ‘reacting’. Place all the moulds on a flat level surface on several thicknesses of newspaper place them close together, (see photos 20, 21, 22, 23).
Now very carefully start to pour the rubber in one corner of one of the moulds, as the rubber begins to run, control the flow by tipping the jug slightly back, until it is literally a thin string of rubber solution, it’s quite easy once you get it balanced. Now ‘drive’ the string of rubber over the component it must be a thin string, aim to just cover the component, don’t worry about covering the wax surface yet, and .n1ove onto the next mould and repeat the process until all moulds have got their components just covered. Now sit back and wait for five minutes, let the rubber find its level on all the moulds.
You will begin to see definition coming through the glossy surface of the rubber of the component beneath (see photos 24, 25, 26,) – now go back to the first mould and gently fill it and all the other moulds with the rubber to about half way up the sides of the moulds. Make up the balance of the rubber, add catalyst and mix as before and top up all n1oulds to the top of the sides. It will take about 24 hours before it will be safe to handle these moulds without causing some damage, so, just leave them alone, let them breathe (you will notice air bubbles 0n the surface but don’t worry).
DON’T EVEN CONTEMPLATE TOUCHING THEM FOR 24 HOURS!
One tip. Don’t try cleaning out the mixing jug when you have finished pouring rubber; believe me you will only get in a heck of a mess and waste a lot of wipes or cloths. Rather, let the residue. drain into a different polyethylene bowl or jug, then, after the same 24 hours that your moulds are taking to set, just pull out the vulcanised. rubber remains which will come out in one piece.


14. Tidying up the edges of the mould. 15. The first half of the mould ready for pouring 16. Applying the release agent to the first half of the mould. . 17. Pouring the RTV 31 rubber, which must be first thoroughly mixed in the tin, into the plastic jug. 18. Adding the hardener. 19. Mixing rubber and hardener in the jug with a wood spatula 20. The first pour goes into the corner of the mould. 21. Allow, the rubber to ‘flow’ around the mould.
Once the catalyst is added you have a pot life of approximately 2 hours so you should have plenty of time for the next stage. I would recommend that you measure out enough rubber to half fill all the moulds you have prepared, so, if the volume of the moulds is say 500ml in total, then you should have 200-250mls in the measuring jug and ‘reacting’. Place all the moulds on a flat level surface on several thicknesses of newspaper place them close together, (see photos 20, 21, 22, 23).

Now very carefully start to pour the rubber in one corner of one of the moulds, as the rubber begins to run, control the flow by tipping the jug slightly back, until it is literally a thin string of rubber solution, it’s quite easy once you get it balanced. Now ‘drive’ the string of rubber over the component it must be a thin string, aim to just cover the component, don’t worry about covering the wax surface yet, and .n1ove onto the next mould and repeat the process until all moulds have got their components just covered. Now sit back and wait for five minutes, let the rubber find its level on all the moulds.
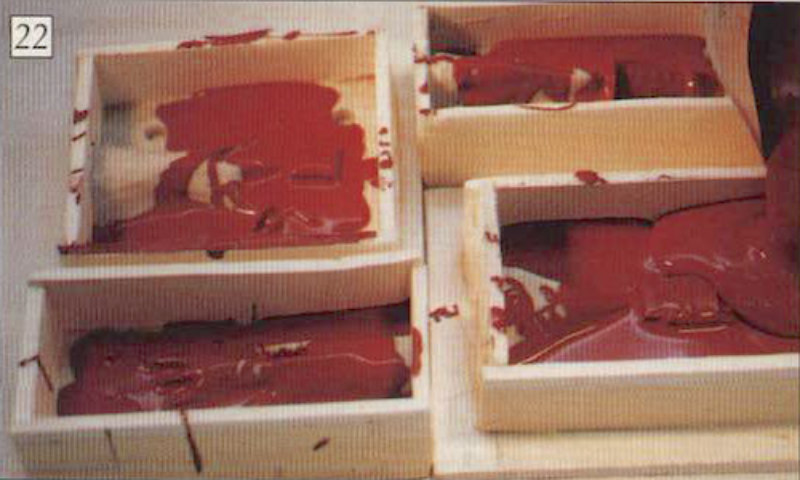
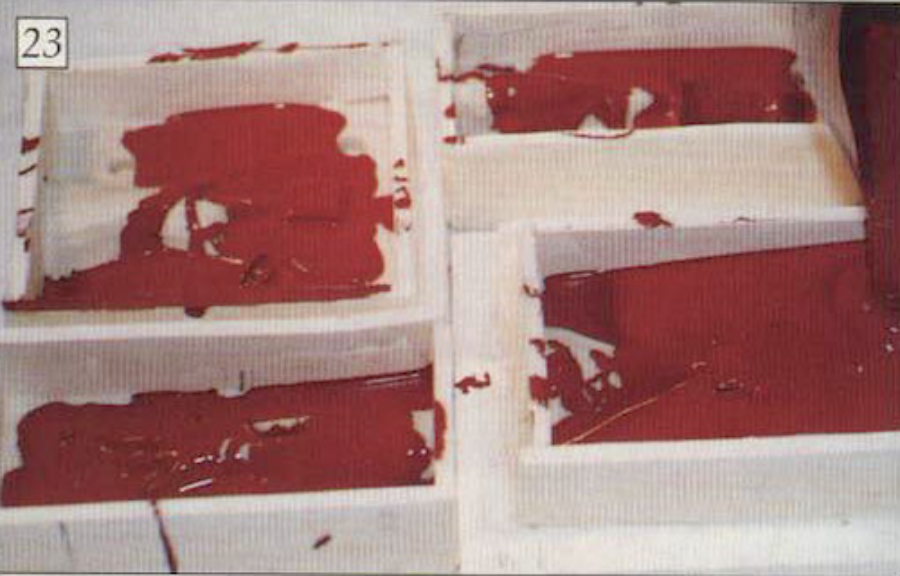

22. Place all the moulds close together on a flat level surface and very carefully start to pour the rubber in one corner of one of the moulds and string it over the pattern.
23. Go back to tlte first mould and fill it with the rubber to about half way up the sides of the mould’s wall.
You will begin to see definition coming through the glossy surface of the rubber of the component beneath (see photos 24, 25, 26,) – now go back to the first mould and gently fill it and all the other moulds with the rubber to about half way up the sides of the moulds. Make up the balance of the rubber, add catalyst and mix as before and top up all n1oulds to the top of the sides. It will take about 24 hours before it will be safe to handle these moulds without causing some damage, so, just leave them alone, let them breathe (you will notice air bubbles 0n the surface but don’t worry).
DON’T EVEN CONTEMPLATE TOUCHING THEM FOR 24 HOURS!
One tip. Don’t try cleaning out the mixing jug when you have finished pouring rubber; believe me you will only get in a heck of a mess and waste a lot of wipes or cloths. Rather, let the residue. drain into a different polyethylene bowl or jug, then, after the same 24 hours that your moulds are taking to set, just pull out the vulcanised. rubber remains which will come out in one piece.

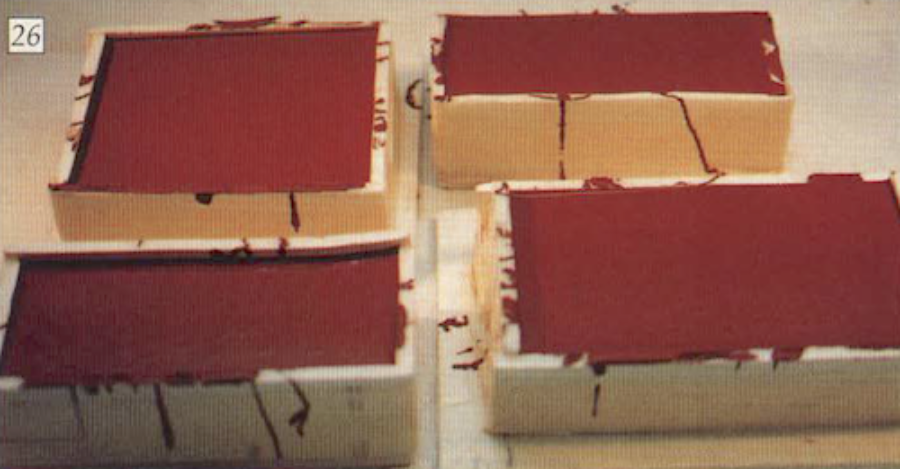
25. Moulds topped up to cover the pattern which is just visible at tile top right.
26. Final pouring should take the level of the rubber just below tire top of the mould’s wall. DO NOT TOUCH FOR 24 HOURS
In the second part of this article I will go through opening the moulds, finishing the opposite mould halves and making the metal castings.
Availability
All materials used in this process are available from:-
Alec Tiranti Ltd.,
Pipers Court,
Berkshire Dr,
Thatcham
RG19 4ER,
United Kingdom
Tel: 0118 9302775.
I used: 0.5kg Scopas white model ling wax ref 101–450.
2.5kg. RTV 31 Silicone rubber and DBT Catalyst. ref 403-120.
400ml. DPl00/2 Release agent ref 400-900. lkg. No.3 low melt alloy ref 803-420.
I also bought the booklet on silicone rubber, which is highly recommended.. Product Code: 990-501
If you contact Alec Tiranti they will send you a very useful catalogue and price list. You might alternatively rather buy their Hand Casting Starter Kit which has all the bits you will need ready provided..
