Hints, Tips, & Techniques!
By Mario Fuentes
Introduction
As we know, the use of acrylic paints is nothing new to figure painting. Yet, for the last couple of years we have seen an increase in both the amount of quality work performed with them and more people that are finding out that acrylics are an easy to use, safe and adaptable alternative for figure painters of all levels.
In modeling magazines, month after month, we gaze through photographs of exquisite figures masterfully painted with acrylics and read through articles written by top painters that give all kinds of sage advice and recipes on what to do with them. However, there still seems to be a void in the “how to do it” area, or to be more explicit, the actual paint handling procedures. The need to fill this gap is what prompted me to write this article based on what I perceive to be the most basic concepts and to explain, as plainly as possible, how to work out specific techniques of painting with acrylics.
While some of you may find the next few pages downright elementary. I do believe that great figure painting comes from having a clear understanding of its most fundamental aspects. Besides, if this is to be a truly educational article, we cannot go any faster than our slowest student. So lets gather a few things and get started.
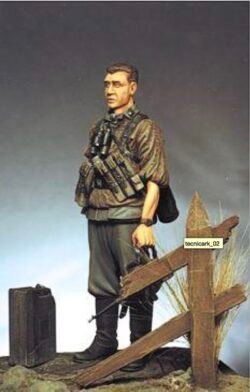
One of my first figures painted almost entirely with Vallejo Acrylics, using the same techniques described in this article. Supplies
Supplies:
Series 7 brushes are the top choice for figure painting.
At left is a #2 miniature and at right, a #2 standard.
As with any other kind of paint, acrylics have their own special requirements, but nothing more than a few tools that will allow us to make the most of them. Let’s do a quick run down of the basic tools:

Brushes:
Save yourself a lot of money and frustration, “buy the best”.
The quality of your work will depend on the quality of your materials. Winsor and Newton Series 7, either standard or miniature (old Series 12) styles are still the top choice for round brushes. Series 7 brushes cost a little bit more, but well taken care of, will outlast and outperform any other brand. You will also need a good quality flat sable brush for coating large areas. Most major brush manufacturers carry at least one series of this type and they all perform quite well for our purposes.
As for brush sizes, I have found that the minimum practical size for acrylic painting is the #0, and there are good reasons for this, it holds just the right amount of pigment and the point is sharp enough to work on the smallest detail. Smaller brushes don’t hold enough paint and by the time you load your brush and get ready to use it, the paint usually dries at the tip, turning your once enjoyable experience into a, quite stressful event.
Unless you are working on very large surfaces a #0, #1, and #2 standard rounds and one #4 flat should be enough for working on figures from 54mm up to 120mm. It is important to note that acrylic paints are inherently rough on brushes. You must make sure to religiously clean your brush often, during painting. At the end of your painting session wash them thoroughly with a good quality brush cleaner to get rid of all paint residue. Read the excellent article by Bob Knee regarding this matter in Historical Miniature magazine, issue #16.
Set aside a set of brushes to be used exclusively with acrylics, any traces of enamel or oil thinners can effect your water-based paints. It is also a good idea to use a cheap brush to thin and mix your paints, a process that really wears down your expensive brushes, which should only be used to apply paint.
Cotton Rag:
You will be using it a lot, a lightly moistened lint free cotton rag like an old T shirt, or even an old towel will do fine. A second choice is a lint free paper towel, although these are prone to break apart during long sessions.
Palette:
A good size plastic or aluminum palette with several wells is a must when working with acrylics. They are inexpensive and keep everything well organized. I cover mine with thin aluminum foil for no other reason than I don’t like to wash the trays all the time, so go with whatever makes you comfortable.
Cleaning Jar:
A glass or ceramic container full of clean water and steady enough for you to swish your brush around in. Remember to change the water as often as possible during your painting session, enough brush cleanings will turn your water into very thinned paint and will contaminate your palette or even worse, mess up your figure.
Water Dispenser:
An eye dropper, empty bottle of any device that delivers single drops of water roughly the same size as the paint drops coming out of the bottle. (Vallejo Acrylics come in a bottle with a built-in eyedropper dispenser).
Water:
Don’t be cheap here, tap water in most cities tends to leave a chalky residue when it dries. Knowing that all kind of funny chemicals are in it, makes me very cautious, so I rather stay on the safe side and use distilled water for all my painting needs.
Plasticard:
A small section of primed plasticard (sheet styrene) makes great practice surface on which to try out the simple exercises found throughout this article, designed to get you acquainted with basic procedures.
Scrap Figure:
I will use a scrap figure, built from my parts box, to illustrate the different techniques described here. The objective is not to paint a specific uniform or figure, only show the basic techniques and procedures and then, once you understand them, it will be your turn to try them on a figure set aside for this same purpose. As soon as you are done, you can always strip the paint from it and be ready to start again. Good quality figures that will enable you to make all kind of mistakes and experiment at minimum expense and anguish, can be bought at bargain prices at any model show.
Vallejo Model Colors Acrylic Paint:
Throughout this article 3 colors will be used for examples: 922 U.S. Uniform Green, 952 Lemon Yellow and 980 Black Green but if you prefer, in table #1, further ahead, you will find several color combinations that will also work well.
Using Vallejo Acrylics:
Features:
This relatively new product owes its success to the fact that it did away with all the problems that had plagued previous lines of acrylics. They are 100% water soluble, totally flat, quick drying, highly pigmented, have an excellent covering power (great for correcting any mistake!), plus they come in these neat bottles that dispense the paint a drop at a time.

And once you are done, the remaining paint at the tip of the nozzle seals the opening so airflow is minimized and the paint won’t set inside the bottles. With a line comprised of more than 200 different colors, varnishes, mediums, glazes, florescent and metallic you can do a lot more other than undercoat with them. Even if you are a “dyed in the wool” oil or enamel painter, give them a try.
You will find that acrylics are unbeatable for some applications and bring about some very remarkable effects. While I still rely on oils and enamels for certain portions of my figures, most of my former painting methods have been replaced, with significant improvement, by acrylics.
Although I still favor oils for the skin portions of my figures, everything else on this Celt by Elite was painted with Vallejo Acrylics. The application of freehand designs like this one is simplified by the use of acrylics due to their color richness and ease. As with any other medium, a sound basic approach will be the cornerstone of a well executed figure. This is where we start! Now that we have the basic materials and some paints, lets go through the main parts of the process one step at a time.


Plan Ahead:
Before doing anything else, clearly establish your objectives for a particular painting session. Arrange the paints and tools you will be using and very carefully study your figure. Familiarize yourself with all the different details and analyze the location and form of the main shadows and highlights. Always practice the techniques you will be using on a scrap surface and most importantly: take your time, don’t rush.
Preparing your Paints:

Shake Your Paint Bottles !
Do what????
You would be surprised at the amount of people that skip this necessary step and later complain that the only thing coming out of the bottle is a clear liquid with some paint on it!
So don’t be shy about it, shake that bottle vigorously, tap the bottom against the palm of your hand and make sure that all the paint is thoroughly mixed. Now, get your palette ready for the next step. Vigorously shake your paints before and during your painting session to maintain uniformity on your mixtures.
Thinning:
|
The use of “very thinned paint” is the essence of painting with Vallejo acrylics. Coming straight out of the bottle, the paint is too thick for most purposes and different degrees of dilution are necessary to achieve the distinct effects that make for a realistic painting job. As mentioned before, we use only very clean water. In order to do this accurately and establish a reference point, we will add a certain amount of water drops for every drop of paint we intend to use. We will designate this as “dilution rate” and it will be noted as “parts of paint” to “parts of water”, (e.g. 1:1, 2:1, 1:3, etc.). The right amount of water is different for each particular situation, nonetheless there are three primary dilution rates with specific purposes that will give us a good starting point: |

-
-
- 1:1 Minimum rate of dilution used primarily for base-coating. Good solid coverage.
- 1:2 Thin coatings, airbrushing, outlining and small details. Thin without being transparent.
- 1:5 Minimum for highlighting and shading. Transparent, base color will show through.
-
Add the necessary amount of water to your paint with an eyedropper or empty bottle to reach an adequate consistency for your needs.

From left; Paint straight from the bottle is too thick and builds up easily. Next; 1:1, 1:2, 1:3 and 1:4 dilutions. It is very important to note that these dilution rates are not absolute. Practice and experience will fine-tune them to your own painting style. As you go along with your painting session, you may notice that paint will begin to dry on your palette. As soon as this happens, add the necessary amount of water and/or paint
in order to maintain the same dilution and consistency, this is very important, so keep an eye on it. Adding a small amount of Vallejo #587 Slow Dry to your palette will delay the drying process and extend the working time of your thinned paints. Preparing your Figure Once your figure has been cleaned and assembled, it is time to lay down the foundation of our painting process by priming and basecoating. The application of these is straightforward and shouldn’t give you any trouble. It is a good idea to prime all your figures, metal or resin. Although this is not necessary on resin, priming will always bring out any flaws that are not easily seen on bare materials and will leave a uniform surface over which to apply a good even basecoat. Always prime with one thin coat, preferably with an airbrush, and let dry for 24 hours.
(Vallejo has its own primer, #919 Foundation White. I personally don’t use it, but if you like white primers this is a very good one).

A uniform primer application is the first step for a quality finish and will show any surface faults not easily seen. Three layers of 922 US Green diluted to 1:1 and allowed to dry, make a good basecoat to work over on our examples. Once the primer has dried it is time to basecoat your figure with whatever color or colors you have chosen for this purpose. For any base-color, always use a midtone value that will enable you to have enough latitude to work in your shadows and highlights, maintaining a good overall balance between them. Use the largest brush possible (use your flat brush) to lay in several thin coats with a dilution rate of 1:1 for an even coverage. Let it dry for about 3 hours before any subsequent paint application.
Applying Paint:
Prior to attempting any technique on an already primed and basecoated figure, we have to learn how to apply thinned paint exactly where we want it without causing any damage to the surrounding areas. This is known as “paint control”, the single most important thing you must learn while working with any kind of paint, but when working with very diluted water based paints, maintaining it becomes crucial.
Any time you load your brush with these very thinned paints, capillary action within the brush will load an excessive amount right into it. This excess is a disaster waiting to happen, as some of us already know. You just need to touch that neatly primed and basecoated figure that you have been working on for days, only to see the paint running wild from head to toe, ruining an otherwise fine job.


Highly thinned paint will overload your brush and run wild all over your figure if you try to apply them directly from your palette. To work with very thinned paint it is necessary to unload excess paint from your brush by gently touching its side against a slightly moist cotton rag.
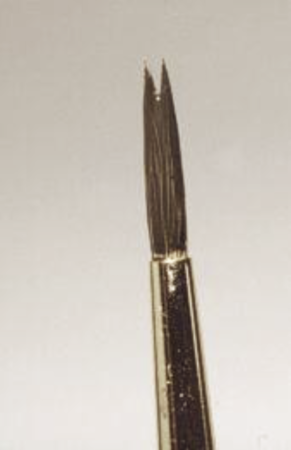
A paint overload will splay the point of your brush, rendering it useless. Unloading excess paint will eliminate this problem.
Well, next time, after loading the brush on your palette, take a short trip to that cotton rag, mentioned before, and touch the side of your brush against it to unload the excess of diluted paint. Don’t worry, even if you see a big stain on the rag the paint is not going to be totally unloaded and leave you with a dry brush. This operation lets your brush retain the right quantity of diluted paint, allowing you to easily apply it and, as an added bonus, will eliminate those splayed brushes so common with acrylics and enamels. You may need to touch the rag with your brush more than once depending on how diluted your paint is or how much paint you need. If you get too excited unloading water and mess up the point of your brush, simply reform it by gently rolling it over the rag. Very important: once your brush has been unloaded, test it over a piece of paper or other surface to make sure that your dilution is working properly and if not, re-adjust the consistency of the paint on your palette and test again. A lot of paint jobs are messed up by skipping this step.
Painting Exercise:
Don’t just take my word for it, try it! On your palette, place 1 drop of paint in 3 different wells adding water to prepare the 3 basic dilution rates mentioned before. For each one of them, start by loading your brush, unload it on your rag, and proceed to paint fine lines or shapes over your practice surface, maintaining good paint control throughout the process. Strive for a clean and even application of lines and shapes by unloading excess water as necessary. Watch how solid or transparent each dilution rate is and experiment by modifying them. Don’t forget to clean your brush each time before loading it again and test your brush before using it.
Methods of Application
Now that you know how to properly thin your paint and apply it where you want it, lets analyze some methods for using your abilities.
Figure painting involves a lot of different techniques with specific applications, however, the most important ones have to do with the subtle color transitions necessary for achieving realistic effects.
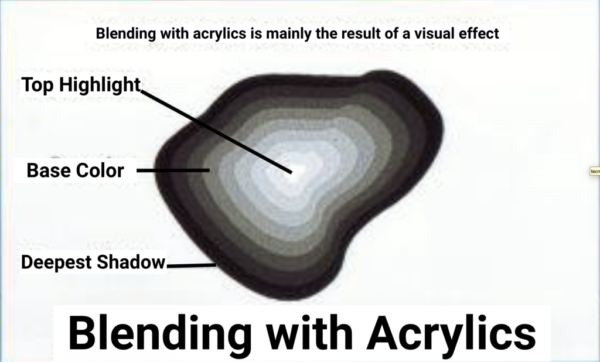
These color transitions comprise a process commonly known as blending, which has one single purpose: blur the border between two adjacent colors, making the transition from one to the other as “soft” as possible.
This can be accomplished in oils and enamels by physically mixing one color into another, in order to soften the edge between them (Diagram 1a).

1a
1b
Layering
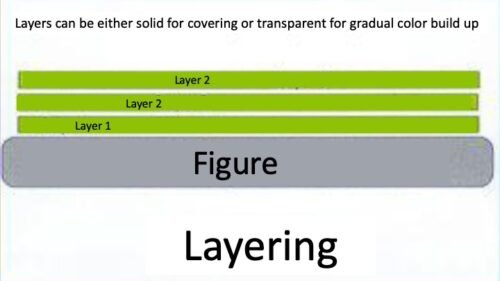
Layering is the application of successive paint coats over the same area. It can be either:
Solid: used wherever full coverage by a single color is desired. Best accomplished by applying several thin coats with dilution rates of 1:1 or 1:2. Used mainly for base coating, patterns, and details.
Transparent*: used wherever gradual color build-up using a single color is necessary allowing the underlying coat to show through. Used for toning, shading, highlighting, and effects. Dilution rates start at 1:5 and up.
*Transparent layers of color are also known as glazes. I will refrain from using this term in order to maintain a clear and simple nomenclature.
PAINTING EXERCISE 1
Now it’s your turn to practice layering.
Using a 1:1 dilution rate, paint a good base coat with 2 or 3 solid layers over an area of your practice surface. Let it dry and then, using another color with a 1:5 dilution, apply one transparent layer over your base coat.
(Remember to unload your brush on the rag) Allowing each layer to dry before applying the next, apply a second and third layer on top, trying to keep your base color showing through. Add more water to your paint if necessary and experiment with higher dilution rates. By this time you should be automatically cleaning your brush each time you use it, don’t forget it.
Feathering:
Feathering is the application of progressively smaller transparent layers of color (feathers) in order to visually blend each layer into the previous one. This visual blending is achieved by slightly increasing or decreasing the brightness or darkness (value) of each successive feather. It is primarily used for shading and highlighting. Dilution rates of 1:5 and higher is necessary.
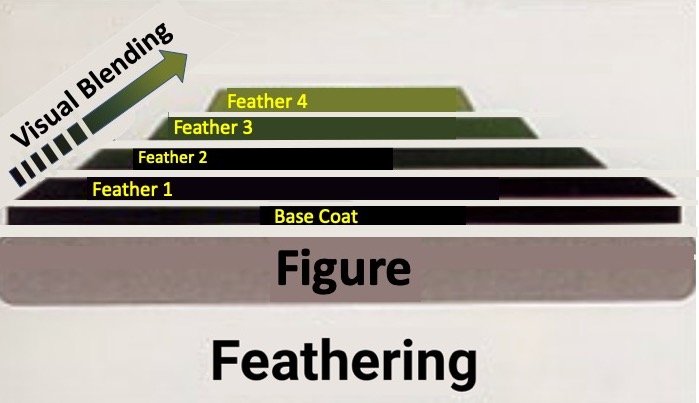

This exercise is accomplished by using progressively narrower brush strokes with each increase in value as described in the text.
PAINTING EXERCISE 2
To practice feathering:
On your plasticard, using 922 US Green as base color with a 1:2 dilution, paint a wide brushstroke. While it dries, prepare your palette by progressively adding small amounts of 952 Lemon Yellow to the base color.
We will do this in 25% increments. This means that you have a first well with only your base color, a second with 3 drops of base color and 1 drop of yellow, a third with 2 drops of each color, a fourth with 1 drop of base color and 3 drops of yellow and fifth with only yellow.
Thin each mixture to a 1:5 rate. Starting with a clean brush every time and using each one of your color increases, apply progressively smaller brushstrokes in order to feather each mixture into the previous one. Use “layering” to give more intensity to each increase if needed and strive for a subtle transition between them. As you become more experienced and expand your color knowledge, you will be able to mix your color increases or decreases as you go along on a single well. This exercise requires some practice a good feathering technique comes with a lot of it, so don’t be discouraged if your first attempts fail.
Highlighting and Shading
The particular theory on this topic is far too extensive for the scope of the present article and I will leave this to the excellent material available that covers it in depth *. This will let us stay within the application process, which by now, you should have a pretty good idea of how it is done. Highlighting and shading are made possible by combing both layering and feathering into a very simple process:
* “Building and Painting Scale Figures” by Sheperd Paine Ð Chapter 3
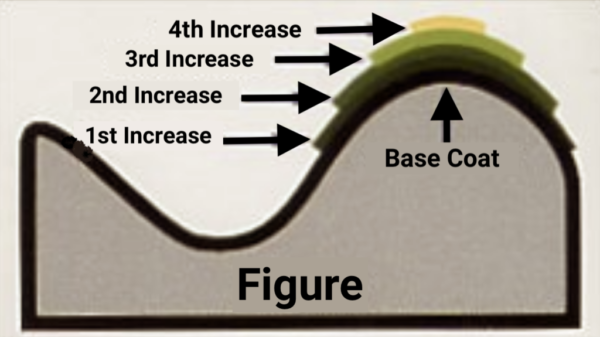
Diagram 4
Highlighting
As a general rule we highlight the raised areas of our figures where light gathers the most. When using acrylics, remember to highlight first. The reason for this lies in the fact that it is easier to cover any mistakes made while highlighting with your darker colors than the other way around.
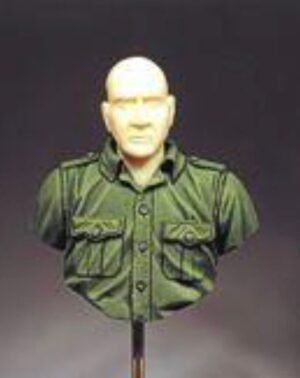

Highlighting: Here a barely noticeable first increase made by mixing 25% of 952 Lemon yellow with our base-color 922 US Green has been applied.
By mixing 50% and 75% of 952 Lemon Yellow with our base-color, a second and third increase are carefully applied
Diagram 4: Highlighting
Highlighting is accomplished by adding a small amount of a higher value color to our base color, thinning it accordingly (minimum 1:5) and starting with the widest feather that corresponds to the lowest point of the area t be highlighted, carefully apply this first increase layering it as required to obtained the desired intensity. Next, add another small amount of highlighting color to your last mixture and apply the next feather on a smaller area again by layering it as necessary. Repeat this process until all your increases have been applied. Depending on the position and desired effect, highlighting can range from a single increase in value to the use of multiple feathers going all the way to the highlighting color itself.
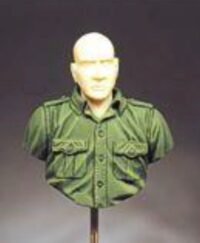
Last increase using pure 952 Lemon Yellow, only, over the top highlights.
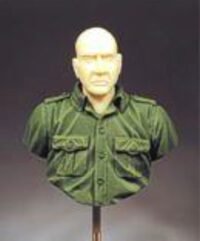
Shading: By adding 25% of 980 Black Green to our base-color, the first decrease is applied on the darker areas.
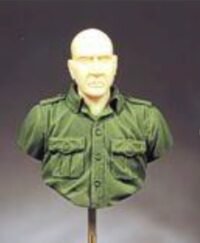
Asecond decrease is applied by mixing 50% of 980 Black Green with our base-color and pure 980 Black Green is used for the darkest areas.
Shading
For the most part, we shade areas where light gathers the least or requires a little help in defining their form and it is normally done once our highlights have been applies.
Diagram 5: Shading
The application process is similar to the one used for highlighting, but in this case we will add a darker color to our base tone in order to create progressively lower values. Shading requires a higher dilution rate and is usually accomplished in no more than 3 color decreases depending on the particular depth of each feature or the desired intensity. Remember that the paint must be very thin, it is better to carefully build up each shadow by layering each decrease application than by using a strong single one that may obscure any painted detail or the base color. Start with dilution rates of 1:8 or higher and be sure to unload your brush on the rag several times before using it. It becomes significant to understand that applying highlights and shadows is a matter of personal style, experience and a good knowledge of color theory. However, successful results with acrylics will always rest on three factors:
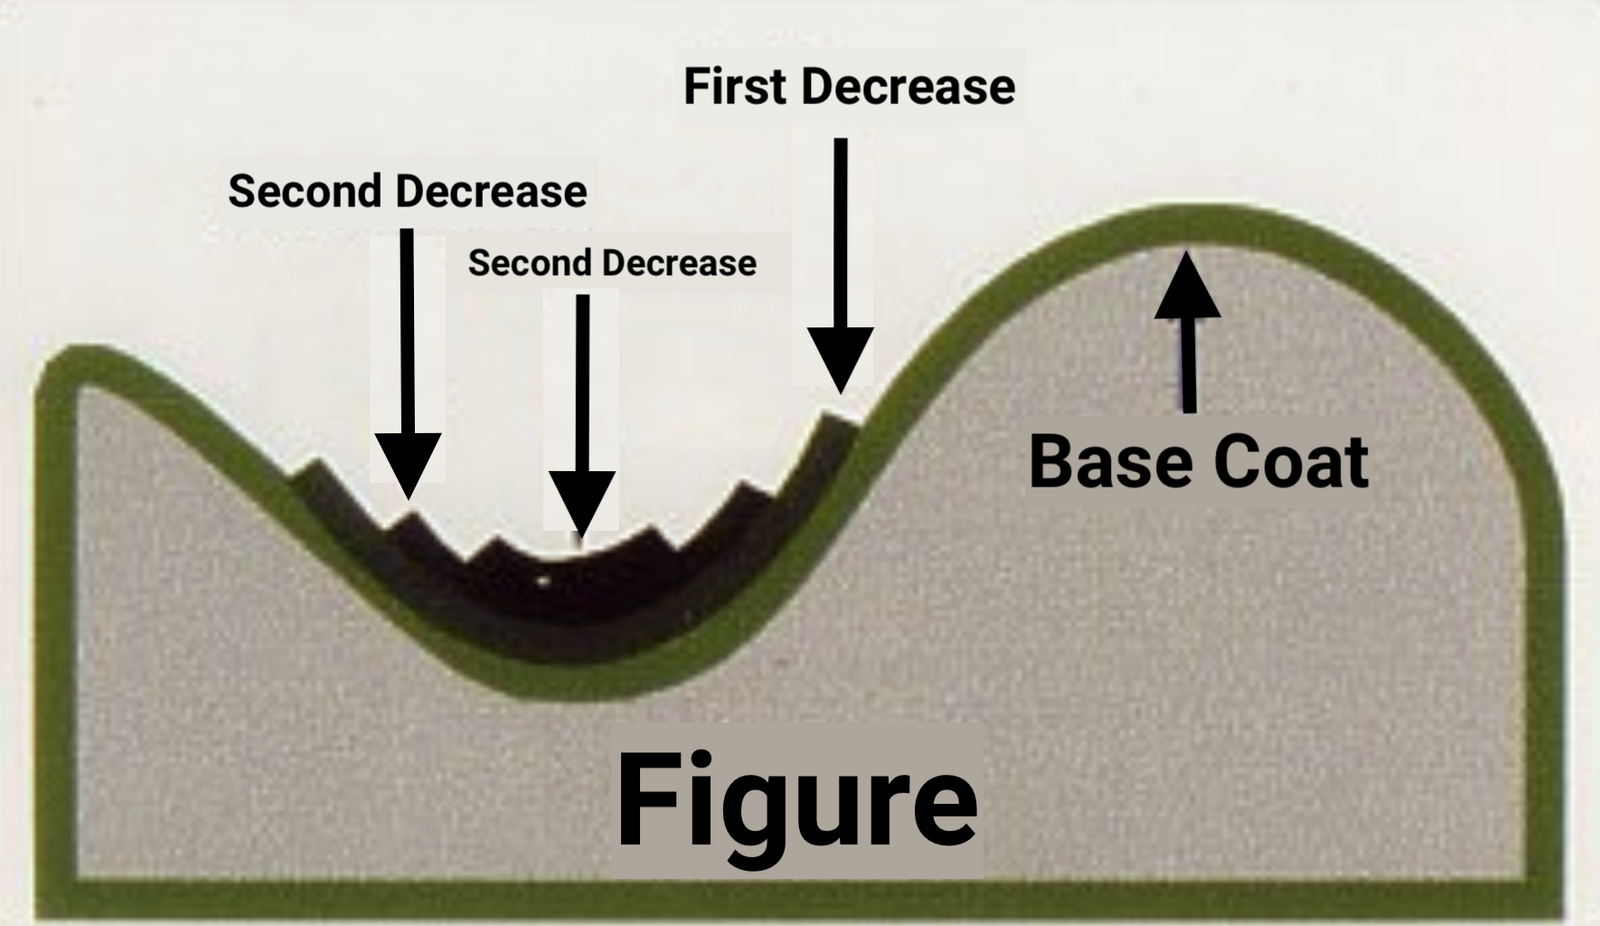
TABLE 1 – SIMPLE ONE COLOR MIXES FOR HIGHLIGHTING AND SHADING
The right color selection.
Here I can only stress that good results require a careful selection of compatible colors and values that stem from a suitable base color. This means that unless you are trying to depict a particular effect, your basecolor must be present throughout all your increases or decreases in order to maintain color harmony. If you need some help getting started in this area. I have included a table (Table 1 – next page) that shows some easy single color highlight/shadow mixtures that you can use as a basic reference. Experiment with these mixtures to acclimate yourself with the technique.
The number of increases or decreases over the color value.
These are determined by the size and configuration of the specific area. On large and shallow areas where subtle transitions are necessary, a higher number of increases or decreases of the base color will be required as opposed to small and deep areas like tight folds and creases, where swift changes between highlights and shadows allow for more intense transitions in fewer steps.
The adequate placement of highlights and shadows throughout the figure.
Even if only a few, when precisely applied they go a very long way. A good understanding of the “Stop Sign Rule” is essential here. Always study your figure under an overhead light so you will be able to recognise the features and planes that give way to the predominant shadows and highlights and then accentuate them accordingly.
Complementary Techniques
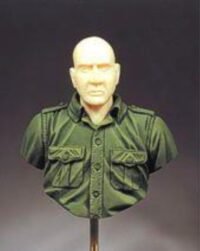

Toning is applied here by using a 1:12 dilution of the base-color in order to soften contrasts and provide a more pleasing balance.
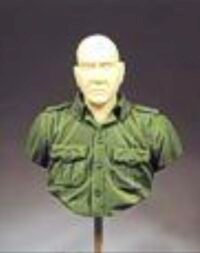
Outlining enhances a figure by separating and defining areas and details, acting as a bold shadow. Pure 980 Black Green was used here.
Once we are done with our basic highlighting and shading it is time to add some important improvements and final touches that will adjust and enhance the contrast between the different areas and details of your figure. The transparency and color intensity possible with acrylics makes them the best choice for these procedures known as toning, outlining, and edging.
Toning:
When painting with acrylics there are times when you may find that your highlights and shades are just too stark, you need a small value adjustment, or maybe a slight tint for a particular effect is required. In these cases we use what is known as toning, which is nothing more than a very diluted transparent layer of color applied over an area in order to soften harsh contrasts, fine tune the overall valance or add that special effect. A dilution rate of 1:12 is a good starting point for this purpose and don’t forget to unload your brush several times before applying it.
Outlining:
Base Color
922 US
Uniform Green
952 Lemon Yellow
980 Black Green
975 Military Green
850 Vallejo Olive
980 Black Green
850 Vallejo Olive
915 Deep Yellow
975 Military Green
915 Deep Yellow
951 White
981 Orange Brown
981 Orange Brown
915 Deep Yellow
940 Saddle Brown
940 Saddle Brown
981 Orange Brown
985 Hull Red
875 Beige Brown
917 Beige
984 Brown
984 Brown
875 Beige Brown
822 Black Brown
908 Carmine Red
956 Light Orange
926 Red
Highlight
909 Vermillion Red
851 Deep Orange
908 Carmine Red
851 Deep Orange
911 Light Orange
909 Vermillion Red
911 Light Orange
915 Deep Yellow
851 Deep Orange
844 Deep Sky Blue
951 White
965 Prussian Blue
965 Prussian Blue
901 Pastel Blue
898 Dark Sea Blue
901 pastel Blue
951 White
899 Dark Prussian Blue
846 Mahogany Brown
929 Light Brown
872 Chocolate Brown
872 Chocolate Brown
875 Beige Brown
822 Black Brown
843 Cork Brown
847 Dark Sand
826 Medium brown
Shadow
856 Ochre Brown
948 Golden Yellow
983 Earth
992 Neutral Gray
951 White
862 Black Grey
830 Field Gray
886 Green Gray
979 Dark Green
886 Green Gray
971 Green Gray
830 Field Gray
871 Leather Brown
977 Desert Yellow
822 Black Brown
921 English Uniform
917 Beige
871 Chocolate Brown
988 Khaki
976 Buff
941 Burnt Umber
Outlining is the application of a solid dark thin line that separates areas and defines details like seams, pockets, flaps, etc. by acting as a bold shadow. This is done by layering a very thin line with the lowest color value for each area to be so defined using a dilution rate of around 1:2 in order to build up color slowly until the desired intensity is attained.
Edging:
Although not as widely known as outlining, when accurately placed, it is just as important and its effects can be quite stunning. Similar to outlining, it is the application of a solid light thin line that separates and defines different areas and details by acting as a bold highlight furthermore increasing the overall sharpness of our figure. A high color value with a 1:2 dilution is required for gradual color build up.
Conclusion
Well, that’s it, and although a whole book could be written about the use of acrylics for painting figures, these few pages embody the core techniques, and as you see, acrylics are not so difficult to use after all. Practice and experience will make the rest. I hope the preceding concepts and ideas will be helpful in getting you started in the use of Vallejo Model Colors acrylic paint or at least provide you with a solid reference point to experiment and go beyond your present technique. This doesn’t mean that you should become an “acrylic only” painter. Each kind of paint has its own merits and excels in certain areas, it is for each one of us to identify and integrate these characteristics into our personal painting style. Let acrylics become another tool in your pursuit of excellence, you won’t be disappointed.
Originally published by Historical Miniature magazine. Writings remain the property of the author and Historical Miniature magazine

